Showing posts with label css trick. Show all posts

Tuesday, 22 September 2015

Amazing CSS attribute Selector with substring matching selection

CSS attribute Selector


If you have learned html and css, you must be aware of how to target element with id or class in css.

<p id="demo_id" class="demo_class"> </p>

above element has id and class which you can use in css to target p element as "#demo_id" and ".demo_class". But apart from these selectors you can select element with other attributes using attribute selector.


<p id="demo_id" class="demo_class" rel="name" title="name of Jon"> </p>

In above P tag we can see attributes other than class and id, like "rel", "title". So it is possible to us to user these attributes for selecting perticuler P tag.


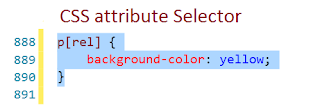
p[rel] {
    background-color: yellow;
}

this css will target p tag which has rel attribute and change its background color to yellow.

It is also possible to use attribute with value. Let's see another example. If we have two P tags


<p rel="name">Rajesh</p>
<p rel="email">rajesh@something.com</p>

And in css if we write


  p[rel="name"]{
    background-color: yellow;
}


Then this css will be apply for the p tag with rel has value "name".


Attribute selector has lot more option to do. Let's take a look at these.

Above example is attribute with exactly match value.


[attribute~="value"] Selector.

The [attribute~="value"] selector is used to select elements with an attribute value containing a specified word.

The following example selects all elements with a title attribute that contains a space-separated list of words, one of which is "image":

<img src="image1.jpg" title="small image " width="150" height="113">
<img src="image2.jpg " title=" image " width="224" height="162">


[attribute|="value"] Selector

The [attribute|="value"] selector is used to select elements with the specified attribute starting with the specified value.

The following example selects all elements with a class attribute value that begins with "top":

Note: The value has to be a whole word, either alone, like class="top", or followed by a hyphen( - ), like class="top-text"!


<h1 class="top-header">Welcome</h1>
<p class="top-text">Hello world!</p>
  

[attribute^="value"] Selector

The [attribute^="value"] selector is used to select elements whose attribute value begins with a specified value.

The following example selects all elements with a class attribute value that begins with "top":

Note: The value does not have to be a whole word!

<h1 class="top-header">Welcome</h1>
<p class="top-text">Hello world!</p>
<p class="topcontent">Are you learning CSS?</p>


[attribute$="value"] Selector

The [attribute$="value"] selector is used to select elements whose attribute value ends with a specified value.

The following example selects all elements with a class attribute value that ends with "test":

Note: The value does not have to be a whole word!


<div class="first_test">The first div element.</div>
<div class="my-test">The third div element.</div>
<p class="mytest">This is some text in a paragraph.</p>


[attribute*="value"] Selector

The [attribute*="value"] selector is used to select elements whose attribute value contains a specified value.

The following example selects all elements with a class attribute value that contains "te":

Note: The value does not have to be a whole word!


<div class="first_test">The first div element.</div>
<div class="second">The second div element.</div>
<div class="my-test">The third div element.</div>
<p class="mytest">This is some text in a paragraph.</p>


Tuesday, 2 September 2014

How to make simple Javascript tab with css and html?

In this session we will write a tabs structure with the help of jquery, html & css.

When you are writing some content on your webpage, then it is better practice that showing your content in a tab format than normal text format. This let your page looks more cleaner than normally formatted text.

If you find tabs jquery on google you will get jquery plugins that will force you to keep unnecessarily heavy js and css files on your webpage, which let slowdown your page. In this session we will write a tabs structure with the help of jquery, html & css.


First of all we will write simple html given below. We are using 'ul', 'li' as tabs(tab heading) and below that we will use 'div' for contain your html code. Each div is having id. You can change internal html as per your requirement. Tabs 'li' is having rel properties containing value of  id of targeted div that to be shown.

/************************Html**********************/

<div class="tabcontainer">

<ul class="tabheading">

                    <li class="active" rel="tab1"><a href="javascript:return false;">Tab 1</a> </li>

                    <li rel="tab2"><a href="javascript:return false;">Tab 2</a> </li>
</ul>


<div class="tabbody active" id="tab1" style="display: block;">
Tab 1
Your Text or html

</div>

<div class="tabbody" id="tab2" style="display: none;">
Tab 2
Your Text or html

</div>

</div>


Below is css for our tab. You may do styling of your tab as you want.


/************************Css************************/
.tabcontainer {
float: left;
width: 100%;
}
.tabheading li.active {
background-color: #fff;
border-bottom: 0;
margin-bottom: -1px;
}
.tabheading li {
display: inline-block;
border: 1px solid #ddd;
background-color: #eee;
margin: 0;
}
.tabheading li a { 
padding: 0 2%; 
}
.tabbody.active {
display: block;
}
.tabbody {
border: 1px solid #ddd;
float: left;
min-height: 10px;
width: 96%;
padding: 2%;
display: none;
}


Now main part of our structer that is our Javascript. Copy & paste this small code given below on your webpage at bottom.

/*****************************Js************************/
<script src="//ajax.googleapis.com/ajax/libs/jquery/1.8.2/jquery.min.js"></script>

<script>
 $('.tabheading li').click(function () {
        var tabid = $(this).attr("rel");
        $(this).parents('.tabcontainer').find('.active').removeClass('active');
        $('.tabbody').hide();
        $('#' + tabid).show();
        $(this).addClass('active');

        return false;
    });
</script>


In this script on click of tab heading li we are reading id from 'rel' property of it and showing div with that id

Thursday, 10 July 2014

Star Rating with simple css and less javascript

I was searching for Star Rating for one of my client. But when I did search for it, I found many plugins with heavy js files. So I tried to build my own plugin with less javascript and more css used in it. And more compatible with asp or other coding languages.

So first of all get star image which is transparent through middle, so we can see background through star shape. like this:


We will use this image in our css.


Then add below html structure in your html page. I am using radio inputrs here. you can use asp radio buttons also as per your requirement.


<div class="StarBtns" title="Rate this Recipe">
<div class="defltRate" id="defltRate2" style="width:0%">

</div>

<div class="Starcon" title="Rate this Recipe">

<div class="Rateradiodiv">

<span class="grRate"><input id="ctl00_ContentPlaceHolder1_rdoRate1" type="radio" name="ctl00$ContentPlaceHolder1$grRate" value="rdoRate1" onclick="getRateshow(1);" /></span>

</div>

<div class="colordiv" style="width: 20%">

</div>

</div>

<div class="Starcon" title="Rate this Recipe">

<div class="Rateradiodiv">

<span class="grRate"><input id="ctl00_ContentPlaceHolder1_rdoRate2" type="radio" name="ctl00$ContentPlaceHolder1$grRate" value="rdoRate2" onclick="getRateshow(2);" /></span>

</div>

<div class="colordiv" style="width: 40%">

</div>

</div>

<div class="Starcon" title="Rate this Recipe">

<div class="Rateradiodiv">

<span class="grRate"><input id="ctl00_ContentPlaceHolder1_rdoRate3" type="radio" name="ctl00$ContentPlaceHolder1$grRate" value="rdoRate3" onclick="getRateshow(3);" /></span>

</div>

<div class="colordiv" style="width: 60%">

</div>

</div>

<div class="Starcon" title="Rate this Recipe">

<div class="Rateradiodiv">

<span class="grRate"><input id="ctl00_ContentPlaceHolder1_rdoRate4" type="radio" name="ctl00$ContentPlaceHolder1$grRate" value="rdoRate4" onclick="getRateshow(4);" /></span>

</div>

<div class="colordiv" style="width: 80%">

</div>

</div>

<div class="Starcon" title="Rate this Recipe">

<div class="Rateradiodiv">

<span class="grRate"><input id="ctl00_ContentPlaceHolder1_rdoRate5" type="radio" name="ctl00$ContentPlaceHolder1$grRate" value="rdoRate5" onclick="getRateshow(5);" /></span>

</div>

<div class="colordiv" style="width: 100%">

</div>

</div>

</div>


Now copy and add this css in your page.
/*****************rating css*******************/


.StarBtns
       {
           /*background-color: #333333;*/
           float: left;
           padding: 0px;
           width: 115px;
           position: relative;
           padding: 0;
       }
       
       
       .Ratebtn1, .Ratebtn2, .Ratebtn3, .Ratebtn4, .Ratebtn5
       {
           position: relative;
           z-index: 1000;
       }
       
       .Starcon
       {
           float: left;
           padding: 0px;
       }
       .defltRate
       {
           background-color: #DAA705;
           float: left;
           height: 20px;
           position: absolute;
           top: 0px;
           width: 89%;
           z-index: 500;
           left: 0px;
           padding: 0;
       }
       
       
       .colordiv
       {
           background-color: #B70606;
           float: left;
           height: 20px;
           position: absolute;
           top: 0px;
           width: 89%;
           z-index: 500;
           display: none;
           left: 0px;
           padding: 0;
       }
       
       .Starcon:hover .colordiv
       {
           /*display: block;*/
       }
       
       
       .Rateradiodiv
{
   background-image: url('../../images/stars.png');
   height: 20px;
   position: relative;
   z-index: 1000;
   width: 23px;
   background-repeat: no-repeat;
   padding: 0;
}
.Rateradiodiv  input {
   height: 100%;
   opacity: 0;
   width: 100%;
}
/*************End of css***************/


You can now check this in browser and you will find that, on hover star rating is increasing. It will give you feel like star rating that you see on other websites and it is without any javascript.


Selecting star:

In webpage we have to select the rating. This can not be possible without javascript.
So we are going to add small javascript code in our page.

Copy below script and add it in your page. 


<script type="text/javascript">

            var f = 3;


            var radiobtn1 = document.getElementById('ctl00_ContentPlaceHolder1_rdoRate1');

            var radiobtn2 = document.getElementById('ctl00_ContentPlaceHolder1_rdoRate2');

            var radiobtn3 = document.getElementById('ctl00_ContentPlaceHolder1_rdoRate3');

            var radiobtn4 = document.getElementById('ctl00_ContentPlaceHolder1_rdoRate4');

            var radiobtn5 = document.getElementById('ctl00_ContentPlaceHolder1_rdoRate5');


            if (radiobtn1.checked) {


                document.getElementById("defltRate2").style.width = "20%";


            }


            if (radiobtn2.checked) {


                document.getElementById("defltRate2").style.width = "40%";


            }

            if (radiobtn3.checked) {


                document.getElementById("defltRate2").style.width = "60%";


            }

            if (radiobtn4.checked) {


                document.getElementById("defltRate2").style.width = "80%";


            }

            if (radiobtn5.checked) {


                document.getElementById("defltRate2").style.width = "100%";


            }


        function getRateshow(g) {
            document.getElementById("defltRate2").style.width = g * 20 + "%";

        }

    </script>


Thats it, We don't need any javascript library for this.Make sure you'r id's are same as in javascript.

Do commenting on this post if you find it useful or not.