Tuesday, 19 August 2014

Simple banner image slider gallery in Jquery

If you want jquery galleries in your webpage, you will get lots of plugins out there. But these plugins are loaded with lots of other js and css files, which are mostly heavy for loading page and also difficult for modification. I was exactly don't want this for my website.


Simple banner image slider gallery in Jquery


       So I tried to reduce javascript for lighten the page. This slider will never do fancy thing but sufficient for show images one by one.

Let us start now. First of all we start with html.

<div class="bannerdiv">
     
      <div class="mainslider">
          
        <img src="images/img1.jpg" alt="Name1" rel="http//yourlink"/>
                <img src="images/img2.jpg" alt="Name2" rel="http//yourlink"/>
                <img src="images/img3.jpg" alt="Name3" rel="http//yourlink"/>
      </div>

<span class="bannercaption">Banner alt will displayed here</span>


       <a class="nextslide slidenav" href="#" id="hyp_NextGallery"></a>
<a class="prevslide slidenav" href="#" id="hyp_PreviousGallery" style="display: none;"></a>

</div>

Here banner div contain two sections. First is 'mainslider' which is containing images of slide show and second one is a span tag which will contain banner caption. You can do styling of it in your way. If you notice banner img tag containing alt and rel attribute, this we will use as our caption for that particulate image.

Now let's do css part. I am setting a height of my banner 500px. You can change it as your need.  


/*******************************css*******************************************//////////////////

.bannerdiv {

position: relative;
float: left;
width: 100%;
top: 0;
margin-bottom: 12px;
margin-top: 50px;
overflow: hidden;
max-height: 500px;
}

.mainslider img {
position: absolute;
width: 100%;
}
.bannercaption{
position: absolute;
bottom: 2px;
right: 2px;
z-index: 1;
font-size: 14px;
color: #fff;
background-color: rgba(0, 0, 0, 0.51);
padding: 5px;
}
a.nextslide {
position: absolute;
color: rgb(255, 255, 255);
top: 0;
font-size: 27px;
background-position: 3px center;
right: 0px;
}

a.prevslide {
position: absolute;
color: rgb(255, 255, 255);
top: 0;
font-size: 27px;
left: 0px;
background-position: -29px center;
}

a.slidenav {
width: 37px;
height: 100%;
background-image: url('../Images/slim-arrow-sprite.png');
background-repeat: no-repeat;

}


It's time for important part of an banner slider, that means Javascript. We are using library here.
Here we are using 'setInterval' for continuous image change. For next and previous we are using two 'a' tags, 'prevslide' and 'nextslide'. On their click we are performing particular task.  
/*****************************js****************************************///////////////////
<script src="//ajax.googleapis.com/ajax/libs/jquery/1.8.2/jquery.min.js"></script>

<script>
$(document).ready(function () {


    $('.mainslider img:gt(0)').hide();
    setInterval(function () { $('.mainslider :first-child').fadeOut(1000).next('img').fadeIn(1000).end().appendTo('.mainslider'); }, 5000);


    $('.mainslider :first-child').fadeOut(1000).next('img').fadeIn(1000).end().appendTo('.mainslider').ready(function () { $('.bannercaption').html("<a href='" + $('.mainslider :first-child').attr('rel') + "'>" + $('.mainslider :first-child').attr('alt') + "</a>"); });


    $('.nextslide').click(function () {

        $('.mainslider :first-child').fadeOut(1000).next('img').fadeIn(1000).end().appendTo('.mainslider').ready(function () { $('.bannercaption').html("<a href='" + $('.mainslider :first-child').attr('rel') + "'>" + $('.mainslider :first-child').attr('alt') + "</a>"); }); ;

        return false;


    });


  $('.prevslide').click(function () {

        $('.mainslider :first-child').fadeOut(1000);
        $('.mainslider :last-child').fadeIn(1000).end();

        $('.mainslider').prepend($('.mainslider :last-child')).ready(function () { $('.bannerauthor').html("<a href='" + $('.mainslider :first-child').attr('rel') + "'>" + $('.mainslider :first-child').attr('alt') + "</a>"); }); 


        return false;

    });


});
</script>

So this is it. This code is simple and lighter than other heavy slider plugins and also easy for modification that you want in your page.

Thursday, 7 August 2014

On scroll load data without refresh through Javascript

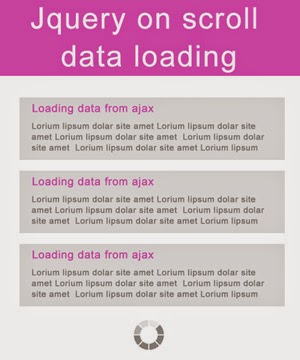
This article will discuss how to load data from server on scroll event of a page. We can see this feature on most of the sites like facebook and other shopping sites also. When we scroll down to the page data loaded by it self without refreshing the page. This feature can improve the user experience to the very high level.


First of all we need html with container div with data list div. we are going to load data from server through client side Javascript/Jaquery and server side c# Webmethod. Here we fetching data by webmethod and binding it with jquery.

But when we do this if we store id of data row at server side, it will create some problem when we go to next page and came back with browser back button.
That's why we are binding data row id to div and read it when we require.

In below html we are using 'loaddiv' to append data on page. On page load we are binding data through asp.net normally.


<!--/********************** Html **************************/--> <div id="loaddiv"> <div id="1" class="idholder"> Some data frome server1 </div> <div id="2" class="idholder"> Some data frome server2 </div> <div id="3" class="idholder"> Some data frome server3 </div> <div id="4" class="idholder"> Some data frome server4 </div> <div id="5" class="idholder"> Some data frome server5 </div> </div>


Now given below is javascript for calling asp.net webmethod and appending response to loaddiv. We reading data id of last list div and passing it to the webmethod.

JS for onscroll load data from asp <script type="text/javascript"> $(window).scroll(function () { if ($(window).scrollTop() == $(document).height() - $(window).height()) { loaddata(); } }); $contentLoadTriggered = false; function loaddata() { $contentLoadTriggered = true; idfecht = $('.idholder:last').attr('id'); $.ajax( { type: "POST", url: "<%= ResolveUrl("~/yourpage.aspx/GetDataFromServer")%>", data: '{divIndex: ' + idfecht + '}', contentType: "application/json; charset=utf-8", dataType: "json", async: true, cache: false, success: function (msg) { if (msg.d == "") { document.getElementById('btnmore').style.display = 'none'; } else { loaddata2(); $("#loaddiv").append(msg.d); $contentLoadTriggered = false; } } } </script> Webmethod will be something like this. You can write it in your way. But do not forget to bind data row id to the list div. [WebMethod] public static string GetDataFromServer(int divIndex) { int n = 100; string resp = ""; CLSyourclass object = new CLSyourfunction(); DataSet ds = new DataSet(); string searchval = HttpContext.Current.Session["preifxtext1"].ToString(); ds = objrec.Sel_morerecipebyidforAll(divIndex.ToString(), searchval); if (ds.Tables[0].Rows.Count > 0) { for (int i = 0; i <= ds.Tables[0].Rows.Count - 1; i++) { string divid= ds.Tables[0].Rows[i]["recipe_id"].ToString(); counter = Convert.ToInt32(divid); decimal rid = Convert.ToDecimal(divid); counter = rid; string yourstring = ds.Tables[0].Rows[i]["your column"].ToString(); resp += @" <div href='" + src.Replace("~/", "") + "' class='idholder' id='" + divid + "'>"+your next data+" </div> "; } return resp; } else { return resp; } }

Wednesday, 16 July 2014

Auto flipping text with css3 and javascript

We know since Html5 and Css3 arrived we can do lots of fun effect in our webpage. In css3 we have different animations and transition effects that's gives us an easiest ways to do webpage more interactive.

There is a property in css3 that is called as transform. There are two kind of transform 2d transform and 3d transform. In this post I am going to use 2d transform for Flip effect.

In this flip effect I want it to flip text panel automatically, which will have two different content on both sides front and back.

First of all we are going to build Html structure for it.


   <div id="flipPanel">
                              <h3 id="header1" class="face">Front text </h3>
                         
                              <h3 id="header2" class="face back" style="display:none;">Back text</h3>
                        </div>

I am using h3 for my text. You may try this with div also and do deterrent design.

We are making two sides of the panel here. So here am  using one main div which content two h3. Let's add css.


#flipPanel {
   -moz-transform-style: preserve-3d;
   -moz-transition: all 1s linear 0s;
    transform-style: preserve-3d;
    transition: all 1s linear 0s;
    -webkit-transform-style: preserve-3d;
   -webkit-transition: all 1s linear 0s;
   
    float: left;
   height: 18px;
    margin-top: 31px;
   width: 100%;
   position:relative;
   
}

.face {
   -moz-backface-visibility: hidden;
   -webkit-backface-visibility: hidden;
    backface-visibility: hidden;
    margin:0;
    position:absolute;
  
}
.face.back {
   -moz-box-sizing: border-box;
   -moz-transform: rotateX(180deg);
   -webkit-box-sizing: border-box;
   -webkit-transform: rotateX(180deg);
   box-sizing: border-box;
   transform: rotateX(180deg);
   
}


This will build your basic structure. You can see only one text instead of both. Because we have flipped panel already and back side is hidden. But this will not play automatically.

For auto play we have to use Jquery part for it.

 <script src="../js/jquery-1.7.1.min.js" type="text/javascript"></script>

  <script type="text/javascript">
 Triggerh1 = 0;
          rotatAmnt = 180;
          var myVar = setInterval(function () { showH1() }, 5000);
          function showH1() {
              if (Triggerh1 == 0) {
                  Triggerh1 = 1;
                  $('#flipPanel h3').slideToggle(1000);
                  $('#flipPanel').attr('style', '-moz-transform: rotatex(' + rotatAmnt + 'deg);-webkit-transform: rotatex(' + rotatAmnt + 'deg)');
                  rotatAmnt = rotatAmnt + 180;
              } else {
                  Triggerh1 = 0;
                  $('#flipPanel h3').slideToggle(1000);
                  $('#flipPanel').attr('style', '-moz-transform: rotatex(' + rotatAmnt + 'deg);-webkit-transform: rotatex(' + rotatAmnt + 'deg)');
                  rotatAmnt = rotatAmnt + 180;

              };
          }

          </script>

You are done. Now run this page in browser.


Thursday, 10 July 2014

Star Rating with simple css and less javascript

I was searching for Star Rating for one of my client. But when I did search for it, I found many plugins with heavy js files. So I tried to build my own plugin with less javascript and more css used in it. And more compatible with asp or other coding languages.

So first of all get star image which is transparent through middle, so we can see background through star shape. like this:


We will use this image in our css.


Then add below html structure in your html page. I am using radio inputrs here. you can use asp radio buttons also as per your requirement.


<div class="StarBtns" title="Rate this Recipe">
<div class="defltRate" id="defltRate2" style="width:0%">

</div>

<div class="Starcon" title="Rate this Recipe">

<div class="Rateradiodiv">

<span class="grRate"><input id="ctl00_ContentPlaceHolder1_rdoRate1" type="radio" name="ctl00$ContentPlaceHolder1$grRate" value="rdoRate1" onclick="getRateshow(1);" /></span>

</div>

<div class="colordiv" style="width: 20%">

</div>

</div>

<div class="Starcon" title="Rate this Recipe">

<div class="Rateradiodiv">

<span class="grRate"><input id="ctl00_ContentPlaceHolder1_rdoRate2" type="radio" name="ctl00$ContentPlaceHolder1$grRate" value="rdoRate2" onclick="getRateshow(2);" /></span>

</div>

<div class="colordiv" style="width: 40%">

</div>

</div>

<div class="Starcon" title="Rate this Recipe">

<div class="Rateradiodiv">

<span class="grRate"><input id="ctl00_ContentPlaceHolder1_rdoRate3" type="radio" name="ctl00$ContentPlaceHolder1$grRate" value="rdoRate3" onclick="getRateshow(3);" /></span>

</div>

<div class="colordiv" style="width: 60%">

</div>

</div>

<div class="Starcon" title="Rate this Recipe">

<div class="Rateradiodiv">

<span class="grRate"><input id="ctl00_ContentPlaceHolder1_rdoRate4" type="radio" name="ctl00$ContentPlaceHolder1$grRate" value="rdoRate4" onclick="getRateshow(4);" /></span>

</div>

<div class="colordiv" style="width: 80%">

</div>

</div>

<div class="Starcon" title="Rate this Recipe">

<div class="Rateradiodiv">

<span class="grRate"><input id="ctl00_ContentPlaceHolder1_rdoRate5" type="radio" name="ctl00$ContentPlaceHolder1$grRate" value="rdoRate5" onclick="getRateshow(5);" /></span>

</div>

<div class="colordiv" style="width: 100%">

</div>

</div>

</div>


Now copy and add this css in your page.
/*****************rating css*******************/


.StarBtns
       {
           /*background-color: #333333;*/
           float: left;
           padding: 0px;
           width: 115px;
           position: relative;
           padding: 0;
       }
       
       
       .Ratebtn1, .Ratebtn2, .Ratebtn3, .Ratebtn4, .Ratebtn5
       {
           position: relative;
           z-index: 1000;
       }
       
       .Starcon
       {
           float: left;
           padding: 0px;
       }
       .defltRate
       {
           background-color: #DAA705;
           float: left;
           height: 20px;
           position: absolute;
           top: 0px;
           width: 89%;
           z-index: 500;
           left: 0px;
           padding: 0;
       }
       
       
       .colordiv
       {
           background-color: #B70606;
           float: left;
           height: 20px;
           position: absolute;
           top: 0px;
           width: 89%;
           z-index: 500;
           display: none;
           left: 0px;
           padding: 0;
       }
       
       .Starcon:hover .colordiv
       {
           /*display: block;*/
       }
       
       
       .Rateradiodiv
{
   background-image: url('../../images/stars.png');
   height: 20px;
   position: relative;
   z-index: 1000;
   width: 23px;
   background-repeat: no-repeat;
   padding: 0;
}
.Rateradiodiv  input {
   height: 100%;
   opacity: 0;
   width: 100%;
}
/*************End of css***************/


You can now check this in browser and you will find that, on hover star rating is increasing. It will give you feel like star rating that you see on other websites and it is without any javascript.


Selecting star:

In webpage we have to select the rating. This can not be possible without javascript.
So we are going to add small javascript code in our page.

Copy below script and add it in your page. 


<script type="text/javascript">

            var f = 3;


            var radiobtn1 = document.getElementById('ctl00_ContentPlaceHolder1_rdoRate1');

            var radiobtn2 = document.getElementById('ctl00_ContentPlaceHolder1_rdoRate2');

            var radiobtn3 = document.getElementById('ctl00_ContentPlaceHolder1_rdoRate3');

            var radiobtn4 = document.getElementById('ctl00_ContentPlaceHolder1_rdoRate4');

            var radiobtn5 = document.getElementById('ctl00_ContentPlaceHolder1_rdoRate5');


            if (radiobtn1.checked) {


                document.getElementById("defltRate2").style.width = "20%";


            }


            if (radiobtn2.checked) {


                document.getElementById("defltRate2").style.width = "40%";


            }

            if (radiobtn3.checked) {


                document.getElementById("defltRate2").style.width = "60%";


            }

            if (radiobtn4.checked) {


                document.getElementById("defltRate2").style.width = "80%";


            }

            if (radiobtn5.checked) {


                document.getElementById("defltRate2").style.width = "100%";


            }


        function getRateshow(g) {
            document.getElementById("defltRate2").style.width = g * 20 + "%";

        }

    </script>


Thats it, We don't need any javascript library for this.Make sure you'r id's are same as in javascript.

Do commenting on this post if you find it useful or not.